How to Assemble a Video Brochure: A Step-by-Step Guide
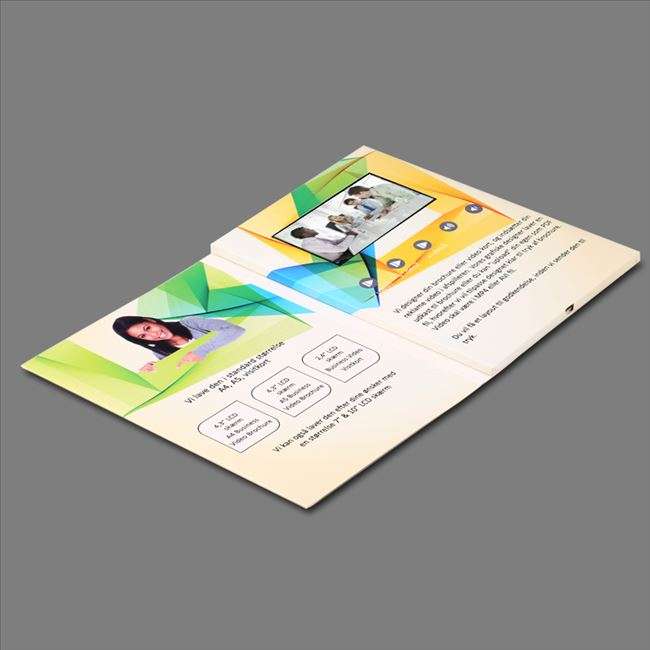
A video brochure is a cutting-edge marketing tool that combines printed materials with embedded video screens, creating an interactive and memorable experience for recipients. These devices are widely used in corporate promotions, product launches, real estate showcases, and educational campaigns. Below is a detailed guide to assembling a video brochure, covering components, tools, and best practices.
1. Components and Materials Needed
Before assembly, gather the following items:
- Pre-Printed Brochure Shell: A custom-designed hardcover or softcover brochure with a cutout window for the screen.
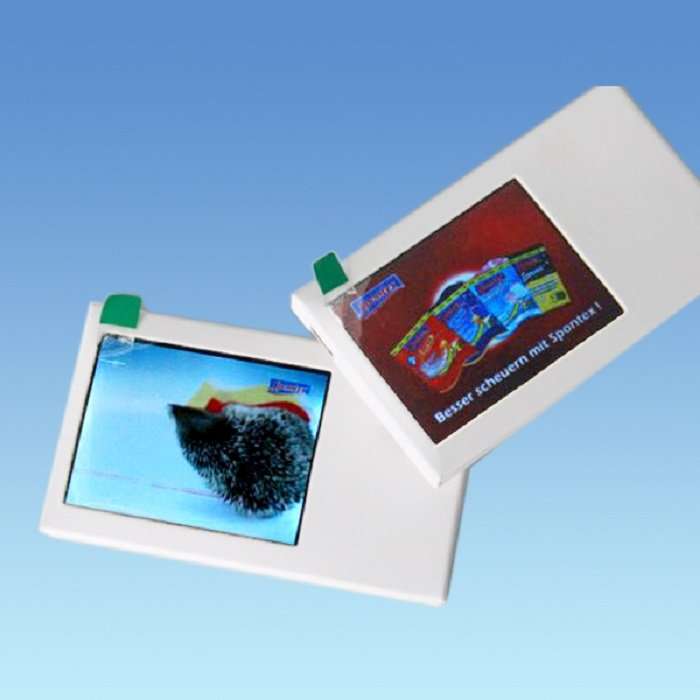
- LCD Video Screen Module: Typically 2.4″, 4.3″, or 7″ in size, with built-in playback controls (play/pause, volume).
- PCB (Printed Circuit Board): Includes a micro-USB port for charging, memory storage (e.g., 256MB–8GB), and a battery (lithium-ion polymer).
- Magnetic Switch/Push Button: For triggering video playback when the brochure is opened.
- Speakers: Ultra-thin piezoelectric or mini speakers for audio output.
- Adhesive Pads/Double-Sided Tape: To secure components inside the brochure.
- Screwdriver (if needed): For securing battery compartments or PCB brackets.
- Content Files: Pre-loaded video (MP4 format) and optional image slideshows.
2. Step-by-Step Assembly Process
Step 1: Prepare the Brochure Shell
- Ensure the brochure’s cover has a pre-cut window aligned with the screen’s dimensions.
- If using a magnetic switch, embed magnets in the brochure’s spine or edges to activate playback when opened.
Step 2: Mount the LCD Screen
- Peel the protective film from the LCD screen’s adhesive backing.
- Carefully align the screen with the brochure’s window, pressing gently to secure it.
- Tip: Use a ruler to confirm the screen is centered and level.
Step 3: Install the PCB and Battery
- Connect the LCD screen’s ribbon cable to the PCB. Ensure the connection is snug to avoid signal loss.
- Attach the battery to the PCB using the provided connector. Some models require soldering; refer to the manufacturer’s guide.
- Secure the PCB and battery inside the brochure using adhesive pads or screws. Avoid placing components near hinges to prevent damage.
Step 4: Add Speakers and Audio Testing
- Position the speakers near the screen or brochure edges for optimal sound dispersion.
- Use adhesive to fix them in place, ensuring wires are routed neatly to the PCB.
- Test audio by powering on the device (via micro-USB) and playing a sample video. Adjust speaker placement if sound is muffled.
Step 5: Integrate the Magnetic Switch/Push Button
- If using a magnetic switch, glue one magnet to the brochure’s spine and the other to the PCB’s sensor.
- For push buttons, drill a small hole in the brochure cover and insert the button, connecting it to the PCB.
- Test the trigger mechanism by opening/closing the brochure or pressing the button.
Step 6: Final Assembly and Closure
- Close the brochure and check for alignment issues. Reopen it to ensure components aren’t dislodged.
- Seal the brochure using glue, staples, or a magnetic closure (if not already integrated).
- Pro Tip: Add a micro-USB port flap to protect the charging port from dust.
3. Software and Content Setup
- Pre-Load Videos: Connect the PCB to a computer via USB and copy MP4 files to the designated folder.
- Auto-Play Settings: Configure the PCB to auto-play videos when the brochure opens (via magnetic switch) or manually via buttons.
- Battery Calibration: Fully charge the battery before first use to maximize lifespan.
4. Quality Control and Testing
- Visual Inspection: Check for screen bubbles, misaligned components, or loose wires.
- Functional Testing:
- Open/close the brochure to verify video playback triggers.
- Test audio clarity and volume levels.
- Ensure the micro-USB port charges the battery.
- Durability Test: Gently flex the brochure to simulate handling and confirm no internal damage occurs.
5. Packaging and Distribution
- Protective Sleeves: Place assembled brochures in anti-static bags or padded envelopes to prevent screen scratches.
- Charging Instructions: Include a brief user guide explaining how to charge the device (e.g., “Charge for 2 hours before first use”).
- Custom Branding: Add a logo sticker or QR code linking to additional digital content.
6. Cost and Customization Options
- Budget Considerations: Prices range from $15–$100 per unit, depending on screen size, battery capacity, and custom printing.
- Customization:
- Full-color printing on brochure covers.
- Multi-video playlists (e.g., product demo, testimonials).
- Branded charging cables or cases.
7. Environmental and Safety Tips
- Battery Disposal: Recycle lithium-ion batteries at designated e-waste centers.
- Child Safety: Ensure small components (e.g., screws, magnets) are inaccessible to children.
- Eco-Friendly Materials: Opt for recycled paper brochures and soy-based inks.
Conclusion
Assembling a video brochure requires attention to detail but yields a high-impact marketing tool. By following this guide, businesses can create engaging, interactive content that leaves a lasting impression. Whether for a product launch, corporate gift, or educational campaign, video brochures blend traditional print with digital innovation, offering a modern twist to classic outreach strategies.